As a car owner, you want your pride to be clean and well-maintained at all times not only because you like having things that run perfectly in your possession but also because taking care of your assets will help hold resale value, too. So, a stain-free carpet, clean seats and debris-free interior are critical. But, that’s not it. Can maintenance also includes another equally important place of focus: Car Plastic. To keep its shine without causing waxy build-up or that nasty oil residue, here are some steps to follow!
Step #1: Careful Vacuuming
Use a brush attachment on the vacuum nozzle and remove leaves, dead bugs, and any other debris from the plastics. Just be gentle because any clumsy movements may scratch the car plastic. At this point, we need to remove any chunks of debris so you can prepare the molding, dashboard and other plastics for the next cleaning step.
Step #2: Clear Dust
Damp a soft cloth with water (no cleaning agents or other solutions) to clear away dust. To get into the crevices (i.e. hand brake, gear shift, radio controls, air vents) and other tight spaces, you can use a small paintbrush (with soft bristles). Alternatively, there are dust mops that will also help you get the job done at are available in the car care section of most discount or grocery stores.
Note: To avoid scratching, or even worse tearing, padded plastics, such as arm rests and seats, it’s best to stay away from brushes that are too stiff.
Step #3: Spray with Auto Cleaner
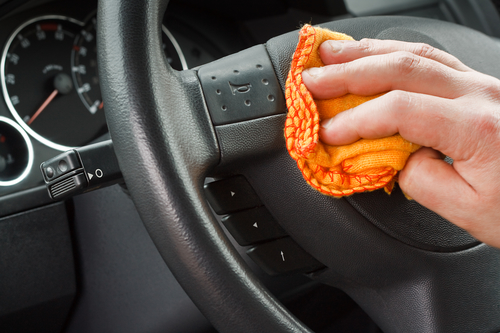
Make sure it’s specifically designed for use on plastic and spray just a light mist onto a small area (not the entire dashboard or other plastic surfaces at once). Use a clean, soft rag or cloth and wipe it off. Do the same with another small area ensuring the cloth you use is always clean (turn it several times to have the clean side available). If the cloth or rug begins to get dirty, it’s of no use to you because you will just be redepositing dirt from one place to another! This step will allow you to remove stubborn dust and any greasy or waxy residues from the last time you cleaned the plastics of your car.
Step #4: Wax On, Wax Off!
Follow the known “wax on, wax off” procedure to wax the areas you have just cleaned. With a detailing brush, remove any build-up from crevices and any textures areas.
Alternatively, you could use a protectant instead. In this case, you’ll need to be a bit more aggressive when rubbing so the product penetrates the plastic to provide your car with long-lasting protection. However, don’t be too harsh on the padded areas to avoid tearing or scratching the plastic.
Note: To keep the plastic protected and shiny for as long as possible, wipe with a soft cloth once a week. This will help you get rid of dust particles and maintain your plastics in good condition until the next cleaning.
How to Remove Stubborn Stains from the Dashboard
Among other incredible uses of vinegar, it can also be used to remove any persistent stains on the dashboard. You will need a spray bottle and a cup of white vinegar. Before you do anything, though, first test a hidden area of your dashboard. If the color doesn’t fade, you are good to go.
1. Pour the vinegar in the bottle and add a cup of warm water.
2. Mix well and spray the affected area(s).
3. Leave for several minutes.
4. Rub with a clean cloth and rinse well.
5. Wipe off with a clean rug.
6. If the stain is still visible, damp a rug with a drop of liquid laundry detergent.
7. Scrub the stained area in circular motions and rinse well with water (always warm).
8. Dry with a clean, dry cloth.
For more cleaning hacks and tips, keep browsing!!!!
