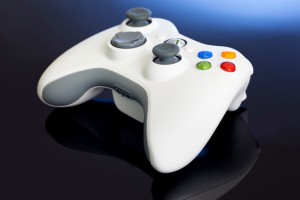
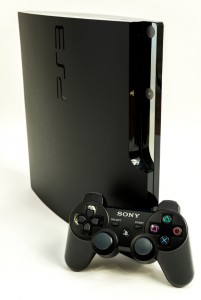
If you have a control pad lying around the home somewhere, then you know for sure that you never clean them. Who does, anyway? To tell you the truth, this can be quite disgusting, if you only think of all those hands that get to keep them from time to time. Since control pads pick up all the crap that was in those hands, it might be time to get the situation in your…well, hands!
To prevent that dampness in the hands from turning your control pads into sludge-filled devices, better check out how you can give them a good rub down and keep them as good as new for long. And, no, it’s not a courtesy to clean your control pads’ it’s a necessity (see how meticulous booth workers at shows like Gamescom are in wiping their controllers down after use?).
Let’s start with some basics…
How Moddable Are The Most Used Controllers?
XBOX ONE
Unfortunately, Xbox One controllers aren’t what we call user-friendly devices. If you want to give them a spa-like treatment, you can open them up and, if required, replace the front shell. However, for buttons and sticks, things can be challenging and you’ll be testing your patience for sure. The Xbox One Elite controlle, though,r that came out in October is significantly more moddable.
PlayStation 3
This one is quite moddable as you can replace all the buttons, including D-pad and thumb pads. Besides that, if you suffer a damaged shell, you can have it replaced or change it into a new color, as long as it’s compatible given that there are a few different models of PS3 controllers.
PlayStation 4
We’re diving into deep waters now. Although doable, it’s more complicated that the other two. Like the PS3. You can replace everything, including the battery, if you want one with longer life. Just be careful not to damage the ribbon cables once you open them up. Also know that some gamers have also swapped in Xbox thumbstick pads, too.
How to Clean Them
If you don’t share your controller, be it with partners or multiplayer, or if you are planning to sell your console, you need to get down to it and clean your pads. It’s not rocket science as you’ll soon find out and this how-to is more of a reminder to do the right thing.
A cloth and some hot water is the cheapest and easiest. Some people recommend using rubbing alcohol and taking the controller apart. But, this is not necessary unless you want to give a full treatment every once in a while. However, you’ll see that humble water will do the work just fine. For this example, we’ve used an Xbox one controller, but the steps are quite the same for almost all control pads out there.
Here’s an easy, middle ground. For that, you’ll need:
• Cotton buds
• Baby wipes (or a soft cloth with warm water and a drop of dishwashing liquid)
• Toothpicks
If you want something performing a bit better at removing the grime on the control pad, then it’s best to use baby wipes as they don’t push the dirt around, which makes removing it easier.
1. Surface Scrub
Just wipe the baby wipe or soft cloth over the rear, grips, etc. until most of the pad is clean. This works for more controllers, unless you have a 360 pad, which needs a bit more work and patience because of its textured patterned. This makes it hold dirt and grime more tightly and you’ll need to be more persistent when giving it a general surface scrub. Dualshock controllers are considerably easier to clean, thanks to their glossy finish.
2. Seam Clean
This cleaning phase includes everything you might have overlooked during the superficial clean. Look for the “seam” on the sides of your control pad (where 2 pieces of plastic are joined). You can reach that area either with your fingernails (wrap a wipe over them) or, if it’s more demanding and difficult than you have imagined, using toothpicks. At this point, you just need to get all the dirt out of there completely and not move it around and place it elsewhere in the controller.
3. The Buttons
This where most grime accumulates. Over time, you’ll notice that grime is discolored and forms a fuzzy layer that covers the majority of the control pad’s surface. When that happens, you know it’s time to clean that grimeland ASAP.
Take a toothpick to get in shoulder buttons, bumpers and triggers. If you see that you can’t clean those areas easily and chances are you’ll leave dirty spots, then maybe you should consider wrapping the toothpick in a wipe. Always finish a job, instead of leaving it half-done.
4. The Underbelly
It gets as filthy as the rest of the control pad and is usually overlooked even by those that clean their controllers often. So, also focus on the area under the thumbsticks. This is where the cotton swabs will be particularly handy. If you look around, you can find some ideally shaped to fit. Again, wrap them in a wipe or soft cloth and run the underbelly with them. You’ll instantly see how clean plastic is supposed to look!
5. What’s Left
Give all ingrained text a hard scrub with a baby wipe and you’ll manage to get most grime out. To finish the job, use a toothpick and pick up any gunk remains. As for duashocks, you’ll normally won’t have any issues cleaning them with just a wipe. However, remember to do rub inside the d-pad, and, of course, the area around the charging port.
And, you are done! It probably didn’t take you more than 2 minutes to get your controller looking like just out of the box! Now, the hard part will be to remember to clean it again so put it in your monthly or bi-monthly agenda! It’s either that or buy a black one next time you are out and about!
Here’s how to clean your other favorite tech-gadgets in a heartbeat!


